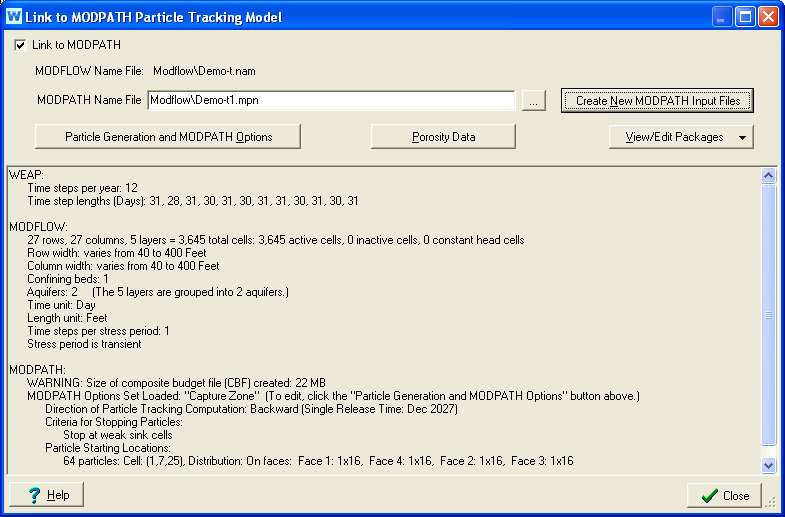
On the menu, choose Advanced, MODPATH Link. Check the "Link to MODPATH" check box.
You can either link to an existing MODPATH model or create a new one from scratch. To link to an existing model, enter the MODPATH Name filename, or click the Browse button (“…”) to browse for it. The Name file must be in the same directory as the linked MODFLOW model. Typically, the "Name" file has an extension of .mpn
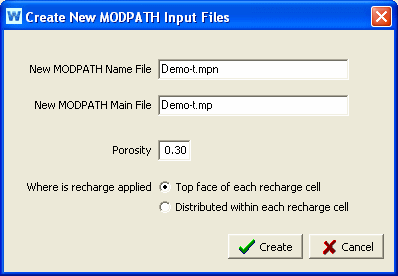
To create a new model, click “Create New MODPATH Input Files,” which will use details from the linked MODFLOW model (e.g., number of layers, rows and columns, IBOUND array) to create a new MODPATH model. A window will pop up, asking for the filenames to use for creating the MODPATH Name and Main files, the default porosity, and whether recharge is distributed within a cell or applied to the top face. The distributed source approximation for areal recharge is usually only appropriate for two-dimensional areal flow models. You can later edit the Porosity (see instructions below); to change where recharge is distributed, you can later edit the Main file package (click the "View/Edit Packages" button and choose the Main file). The MODPATH Name file created will only include the Main package--all other packages will be added when WEAP runs MODPATH.
Information about the WEAP and MODFLOW models is displayed, along with the current MODPATH options and particle generation. You may edit the particle generation and MODPATH options by clicking the "Particle Generation and MODPATH Options" button. Note: you must have at least one particle generated in order to run MODPATH. Click the "Porosity Data" button to edit the porosity data for each cell. Use the "View/Edit Packages" button to view or edit the Name and Main files. (Other files may be listed in the Name file, but they are either output files or binary input files--in either case, they cannot be viewed here.)